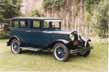
 Plymouth: The First Decade
Roof Installation
Neither the service manual for 1934 Plymouths nor the 1933 DeLuxe (PD) Plymouth Owners manual indicate how the roof insert is to be installed. I have been giving a one page photocopy of a Dodge Brothers commercial vehicle service manual that does give the procedure. Unfortunately the photocopy does not indicate what publication the page is from.
I am not sure when this style of roof construction was introduced. I suspect that the 1932 PB was made the same way but am not sure.
Some later years used an extruded rubber seal strip around the roof insert. When that started and whether or not they used “dum-dum” in addition to the rubber seal is also unknown to me.
(Click on the illustration and photo for a larger images.)
Top Deck
The top decks on Dodge Brothers Commercial Cars and Trucks are mounted on hard-wood frames before being pressed into the opening in the top of the body or cab. The foundations (1) for the top deck material (5) vary, fibre board being used on bodies which do not have an interior headlining and padded wire mesh on those which are lined. The method of servicing the top deck, however, is identical on both types.
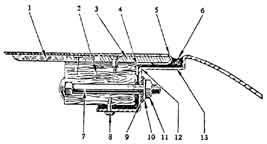
The top deck material (5) is stretched over the foundation (1) around the projecting edge of the steel flange (3) and is tacked to the hard wood frame (2) with upholstering nails (4).
To install or reseal a top deck, remove all traces of “dum-dum” from the flanges in the metal roof panels (13). Lay a ribbon of “dum-dum” one quarter inch thick and one inch wide over the corner of the top deck recess (12) in one continuous layer on all four sides and corners of the top deck opening. Press the frame down into the opening under pressure and insert frame screws (8). Tighten screws until “dum-dum” is forced out of joint (6) and, with pressure still applied to top deck, insert bolts (17) using rubber washer (9) and plain washer(10) under nut (11).
Scrape excess “dum-dum” out of groove (6) leaving a slightly depressed surface, as illustrated, to allow for expansion. Build up any low spots in the “dum-dum” with a putty knife and knead with the fingers.
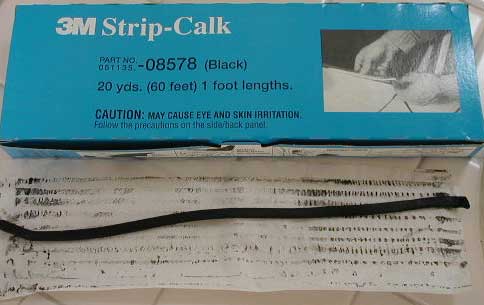
When I did my roof, the local auto body repair supply store indicated that 3M “strip-calk” was the same basic stuff that was called “dum-dum” in the old days. So that is what I used. The car has been driven in the rain several times since the roof has been installed and is leak free. The strip-calk is still soft and pliable after at least 6 years.
For 1933, Plymouth cars were “pre-wired” for radio installation. In practice this meant that the wire mesh in the roof was electrically isolated from the body. An antenna wire was run from the front right corner of the roof wire mesh down the passenger side door post.