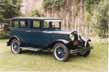
 Plymouth: The First Decade
Brake Adjustment
 The Lockheed
hydraulic brakes on many early Plymouths pivot the brake shoes
around an eccentric anchor bolt. This bolt is supposed to be
properly adjusted when new shoes have been installed or after a
couple of “minor adjustments” have been made.
Unfortunately the instruction manual calls for special tooling to
make this adjustment and that special tooling is difficult to find.
However it is possible to get the brakes reasonably well
adjusted without the special tools, it just takes a lot more
time.
The Lockheed
hydraulic brakes on many early Plymouths pivot the brake shoes
around an eccentric anchor bolt. This bolt is supposed to be
properly adjusted when new shoes have been installed or after a
couple of “minor adjustments” have been made.
Unfortunately the instruction manual calls for special tooling to
make this adjustment and that special tooling is difficult to find.
However it is possible to get the brakes reasonably well
adjusted without the special tools, it just takes a lot more
time.
Note: A set of similar instructions can be found in the downloads area of the P15-D24 forum.
If you have the special tooling or if you have a dial indicator and/or can make the special tooling, then you should check out the brake instructions at the Imperial Club’s web site. You will very likely get a better adjustment of the shoes than with the procedure below.
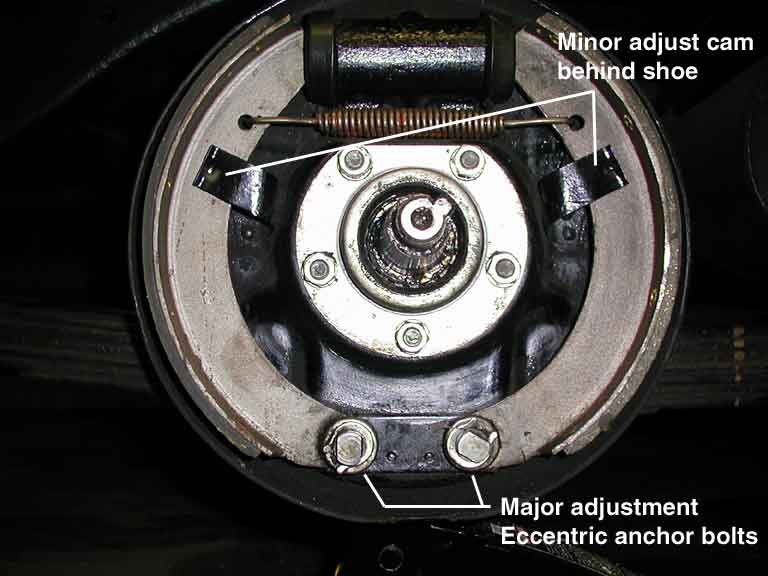
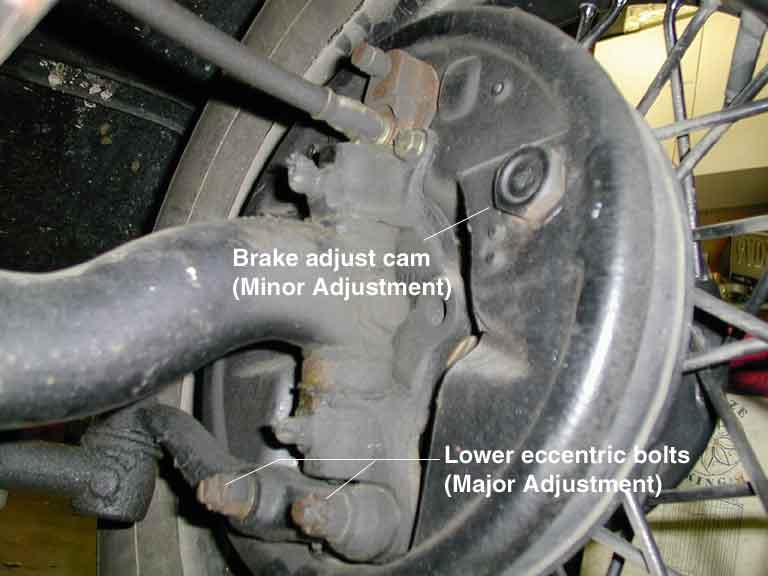 Referring to the photo at the left (click on photo for an
enlarged view): On the back of the brake backing plates are large
hexagonal bolt heads that are connected to adjusting cams. These
adjusting cams are a little over halfway up the brake shoe. These
cams perform the minor adjustment.
Referring to the photo at the left (click on photo for an
enlarged view): On the back of the brake backing plates are large
hexagonal bolt heads that are connected to adjusting cams. These
adjusting cams are a little over halfway up the brake shoe. These
cams perform the minor adjustment.
The bottoms of the brake shoes are secured via clips to eccentric anchor bolts. These bolts are the major adjustment points. On the front of the 1933 Plymouth, these lower eccentric anchor bolts also help hold the backing plate to the knuckle arm.
Major Adjustment
A major adjustment should be made when ever new or reconditioned brake shoes are installed. A major adjustment should also be performed after every two or three minor adjustments.
If the outer part of the eccentric anchor bolts do not have screw driver slots in them, you will need to add them: Remove the anchor bolts and grind off the surface hardness. Then using a hacksaw blade, cut a screwdriver slot into the outer section parallel to the inside adjusting flats.
- Set the minor adjusting cam to its fully released position (all the way in).
- Loosen the nuts that secure the eccentric anchor bolts to the backing plate so that the eccentric anchor bolts may be rotated.
- Turn the eccentric anchor bolts inward toward the axle until both brake shoes are at the topmost, inward position.
- Install brake drum.
- Adjust one shoe at a time:
- Turn minor adjusting cam out and away from the axle until the brake just drags.
- Using a screwdriver, turn the anchor eccentric bolt of the same shoe inward and down. Movement of the eccentric anchor lowers the shoe so that the lining at the top no longer drags.
- Repeat the above two steps until adjusting the eccentric anchor bolt no longer frees up the brakes.
- Back off both adjustments slightly until drums turn freely.
- Tighten the nuts that secure the eccentric anchor bolts to the backing plate.
- Check and refill the master cylinder reservoir. (Adjusting the shoes will allow the wheel cylinder pistons to move outward slightly increasing the static volume of the hydraulic system.)
Minor Adjustment
- Turn one of the minor adjusting cams out while spinning the wheel. When a slight drag is felt, back off the cam slightly.
- Repeat for the other shoes.
- Check and refill the master cylinder reservoir. (Adjusting the shoes will allow the wheel cylinder pistons to move outward slightly increasing the static volume of the hydraulic system.)