 Plymouth: The First Decade
Disclaimer: While an effort has been made to assure a
reasonable repair procedure, no guarantees are made. We are not
responsible for any damage or injuries that may occur as a result of
following these instructions. The only vehicle these procedures has
been tried on is a 1931 Plymouth PA. Applicability to any other
vehicle is for you to decide.
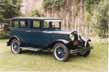
1931 Plymouth Brake Drum Replacement
New brake drums for older Plymouths are not being made so one has the choice of finding a good set of original drums, repairing the ones you have or finding an alternative. This article by Patrick Smith shows a way to use Model A Ford drums on a 1931 Plymouth.
by Patrick Smith
- Tear down including removal of the backing plates.


- Order four front 1931 Model A Ford cast iron drums, Dorman 610-169 wheel studs, Grade 8 Hex Nuts 1⁄2 - 20 fine thread, Mil Spec steel flat washers 1⁄2 X .02 (shims) from McMaster–Carr, Front Oil Seals 473458 from Advance Auto, and rear seals from Andy Bernbaum
-
 I had all the brake shoes
resurfaced at Arizona Brake and Clutch for here in Phoenix
AZ for right around $125.
I had all the brake shoes
resurfaced at Arizona Brake and Clutch for here in Phoenix
AZ for right around $125.
- I fabricated all the gaskets using gasket materials purchased at my local auto supply store.
- My hubs had three welds to the drums. Using a hand grinder I separated the hubs from the drums and removed the oil seals from the front hubs.
- With drums, hubs, and wheel studs I visited my friend’s machine shop. This may be the trickiest part, finding a machinist willing to spend the time to make it right.
- We milled the center of the Model A drums to match the
step in the Plymouth hubs on the metal lathe, turned a step
into the wheel studs to allow for the new drums to slip over
the Plymouth hubs (the stud layout on the Model A drum
matched the Plymouth layout), Drilled out the Plymouth hubs
to allow the new wheel studs to be pressed in.

- While everything was apart I took some time to media
blast and repaint all the parts with a good engine paint.
Make sure to remove the wheel cylinders from the backing
plates while media blasting to avoid pitting the connection
to the brake hose.

- My wheel studs were ¾" studs. I wanted a smaller stud to allow for easy removal of the wheel so chose to use the Dorman 610-169 (1⁄2"-20 Serrated Wheel Stud - .620 in. Knurl, 1-5⁄8" in. length).
- By using the 1⁄2" wheel
stud I had to make a tapered washer (metal lathe) using cold
rolled stock. This washer sits in the depression on the
wheel, then metal washer, the hex head nut.


- During reassembly of the front backing plate I used the
Mil Spec washers (2 each bolt) to achieve the shim on the
front. Too much shim and the new drum will cut into the dust
boot (rubber cup) on the wheel cylinder. On the rear I
purchased a sheet of 1⁄8"
steel and using hole saws drilled out the shims.
2-1⁄2" inside center and
4-1/4" outside diameter.


- Almost home now! Turn all adjustments in to allow the new drum to be installed. Install the shoes and hubs; install the wheel using the tapered washers, Mil Spec washers, and then hex nuts. Spin the whell. Start adjustments with the bottom brake shoe anchor-bolts till you have the adjust center of the wheel spins freely. Next at the top of the backing plate the ¾" bolts need to be adjusted downward till you have slight resistance on the wheel.
- Bleed the brakes and go for a test drive!


